Amazia - Premium Responsive Opencart 2.0 Theme
- created: 11/11/2014
- latest update: 11/11/2014
- by: latestthemes
- latestthemes.net/
- email: support@latestthemes.net
Overview
Amazia - Premium Responsive Opencart 2.0 Theme is an advanced opencart theme with custom THEME ADMIN PANEL.
- Compatability opencart 2.0
- Multi-Language Support
- Powerful Admin Panel
- Product Special Discount Timer
- Discount ribbon percentage
- Simple Blog/News Module
- 500+ Google Fonts
- Unlimitted color options which can be changed from theme admin panel settings
- Custom Banner Module
- Custom footer where you can add icon and text.
- 8 Predefined social icons and custom content
- Predefined payment images with option to upload your own images.
- youtube video,facebook fanbox, twitter feed which can be displayed in side of your pages.
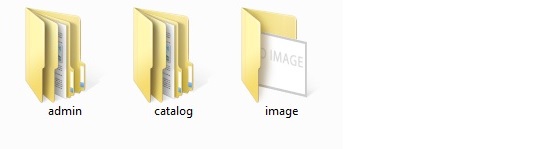
Before we start, lets take a look on the folder structure of the theme. All theme files are placed in the Upload folder. The files to upload folder consists of 3 more folders for different types of theme assets:
- Admin - containing all custom admin features
- catalog -containing all theme files, custom controller, language files and the theme specific CSS and JS files
- Image - containing the theme thumbnail
- There is an extra file amazia.ocmod xml file which is used for modification
Uploading and Installing the Theme
Note: No Core files has been changed so no files will be replaced. Amazia uses default ocmod modification setup.
There are two ways to Uploading the Amazia Theme .
First Way
- Extract the zip file Amazia Responsive Opencart Theme - Extract file contains 2 files amazia.ocmod.zip and amazia.ocmod.xml.
- Extract the zip file amazia.ocmod zip folder it contains the folder named upload.
- Inside the Upload folder it has 3 folder admin,catalog and image.
- Upload these 3 folder to the root folder of your store.
- Then goto admin panel extension->extension installer - click upload and upload the file amazia.ocmod xml file
- Then goto Extension->Modification and click on the refresh button
Second Way
- Extract the zip file Amazia Responsive Opencart theme - Extract file contains 2 files amazia.ocmod.zip and amazia.ocmod.xml.
- Then goto admin panel extension->extension installer - click upload and upload the file amazia.ocmod Zip file.
- In the same extension installer - click upload and upload the file amazia.ocmod xml file.
- Then goto Extension->Modification and click on the refresh button.
Activating the Theme:
When the theme files are uploaded you would need to activate your theme in System->Settings. In Settings click on edit and then goto Store tab in that change the Template value default to Amazia and click save.
After that goto System->Users->User groups in that select module/ltbanner, module/amazia, extension/news and module/news for both Access Permission and Modify Permission and save .
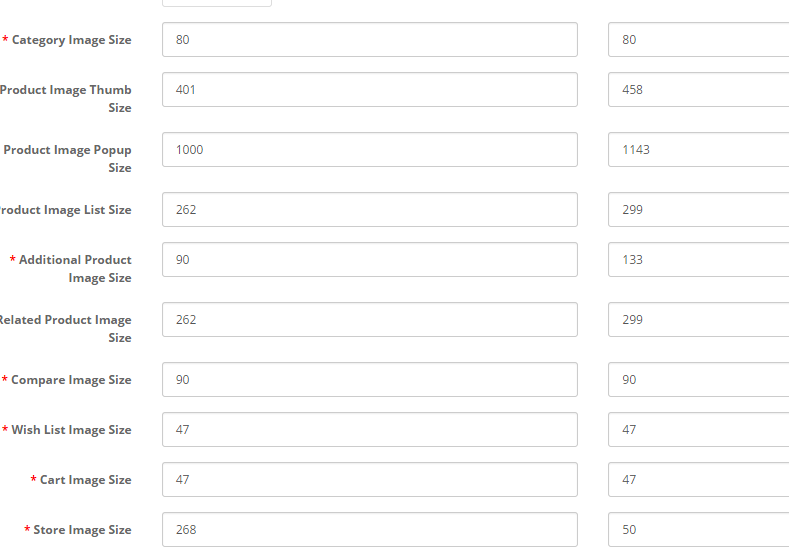
Image Settings:
Before you start using your store with the Amazia - Premium Responsive Opencart Theme , Image settings must be edited with the following values:
You can change the image settings in System->settings in that you have to click on edit. In that goto image tab here you have to change the values according to the images shown below.
Theme Settings
This is the module where you control the different aspects of your theme like Theme Color, Google Fonts, Social Icons, Custom content, Payment Images, Facebook fanbox, Twitter timeline, youtube, Custom footer with icons .
For using the theme settings you have to install the LT Theme Settings from Extensions->Module . In module install the LT Theme Settings. After installing it click on edit of the LT Theme Settings .
There are 6 menus under the theme settings.
- General Settings
- Color Settings
- Font Settings
- Custom Footer
- Payment Icons
- Social Networks
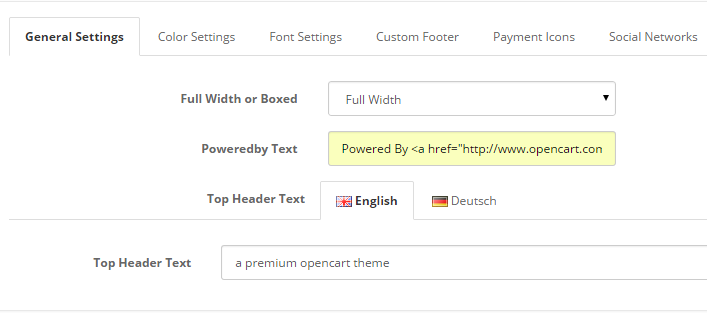
General Settings:
It contains 3 options.
1) You can set Full width or boxed layout for your store .
2) Powereby Text - You can change the footer poweredby text - eg:
3) Top Header Text - It is a small text that is displayed next to logo on header
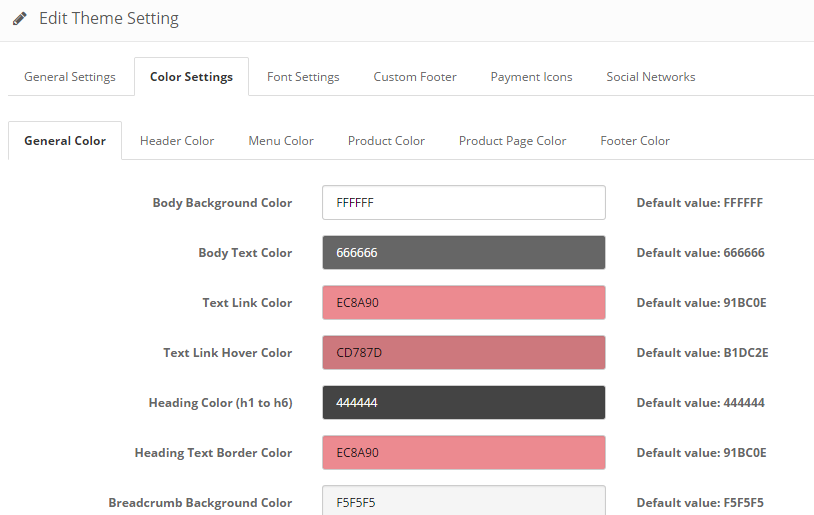
Color Settings:
In color settings you can change color code for all most all the fields in your store .
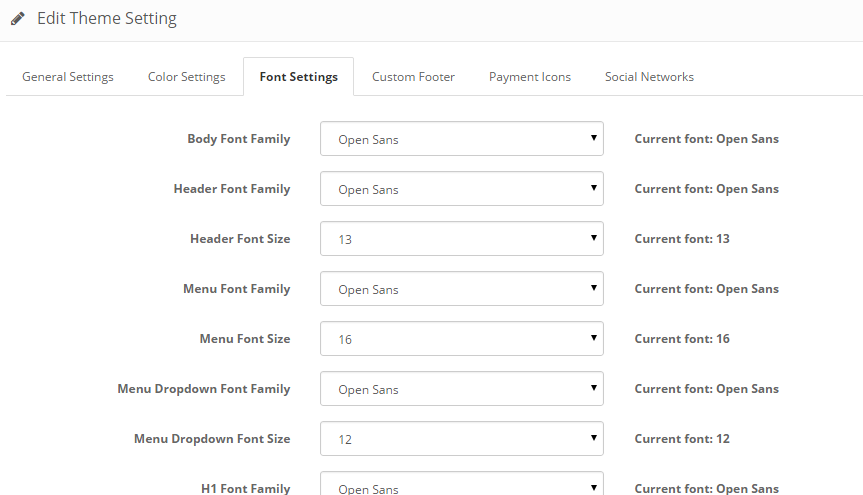
Font Settings:
In this tab you can set the required font for your store . Font can be set for different fields . You can select the your fonts from 500+ google fonts . And also you can set the Font size. To check your preferred font goto Google Fonts
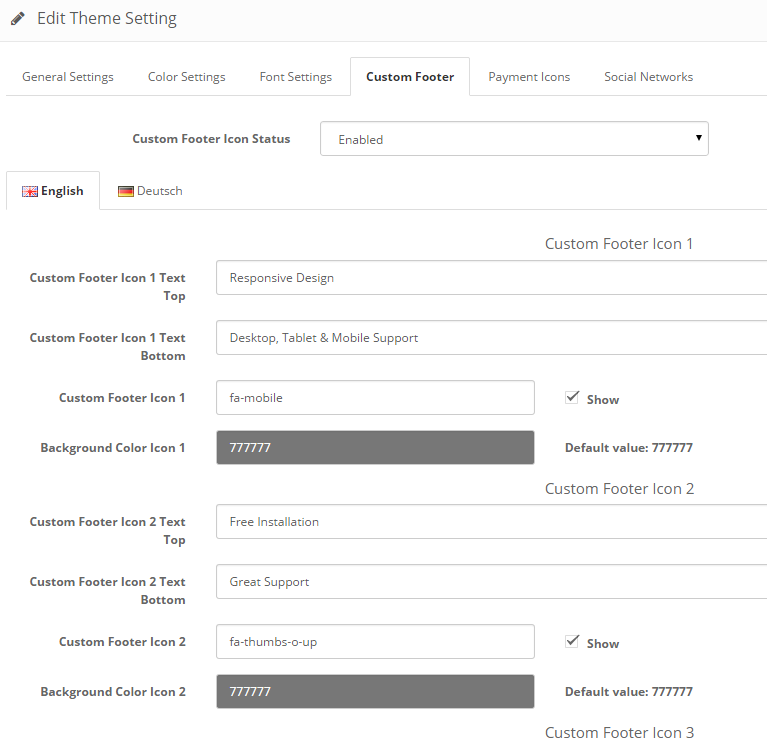
Custom Footer:
In this tab you can set custom footer text bar with icons . It supports multi-language. In Custom footer text you can give two text part one is top text and another is bottom text which you can see from the theme demo . And for the Field Custom Footer Icon 1 you have give the font value from Font Awesome which you can get from the link Font awesome
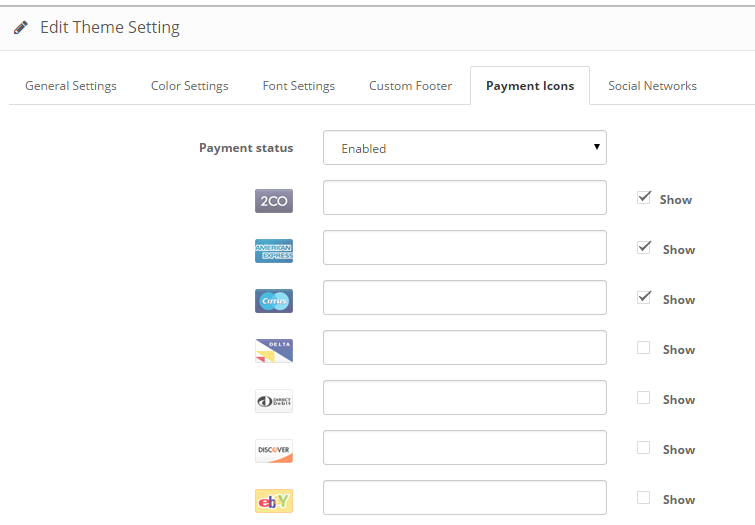
Payment Icons:
In this tab you can select the payment icons and also you can upload your own payment images . You can upload upto 3 payment images . The uploaded image size should be width 38px and height 24px .
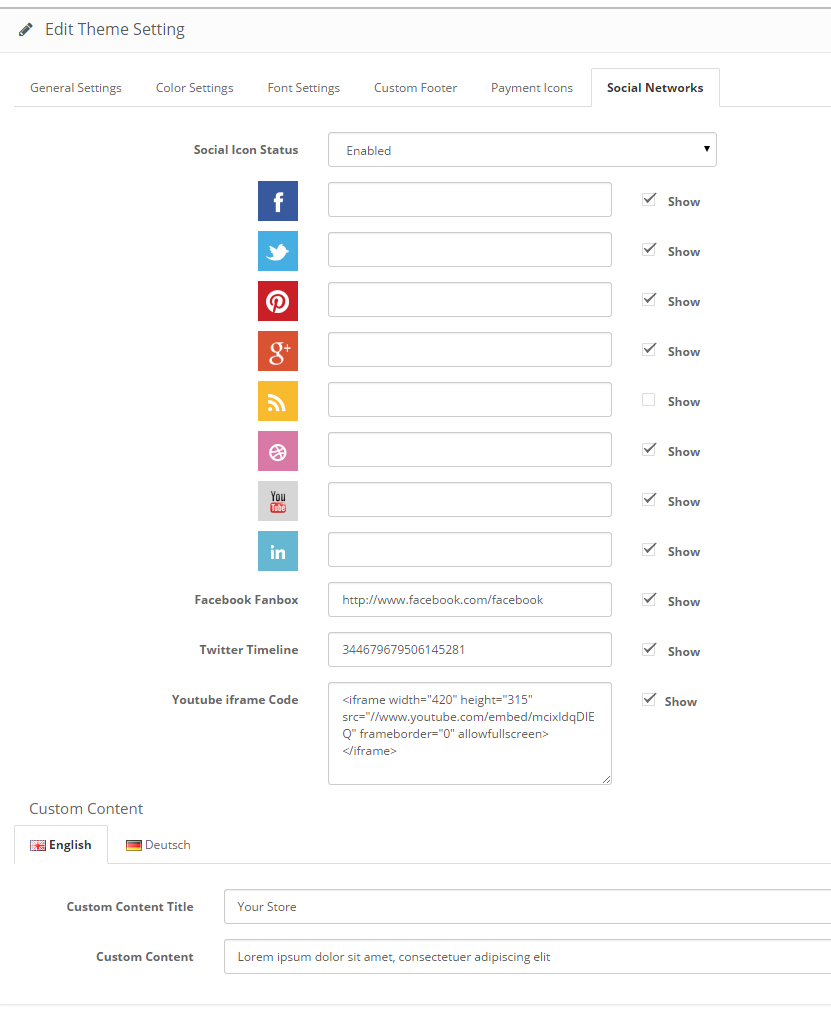
Social Networks:
In this tab you can set social icons, custom content, Facebook fanbox, twitter timeline and youtube video.
For Facebook fanbox you have to give your page url in the field(Not the profile url).
For twitter you have to give your twitter widget id which you can get it from your twitter account. Login to your twitter account.goto settings->widget. in that create new widget. In this you will see an html code in a box . in that copy the data-widget-id value and paste it in twitter-widget-id.
For Youtube you have to give iframe code of the youtube video . For Youtube video the width and height should be 420 and 315 respectively.
Latest,Featured,Special and Bestseller Module Settings:
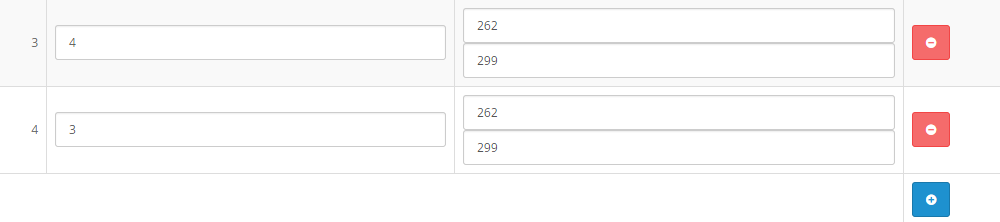
For the modules Latest,Featured,Bestseller and Special Image settings is width 262 and height is 299 and it is same for all the position (column left , content top, content bottom and content right)
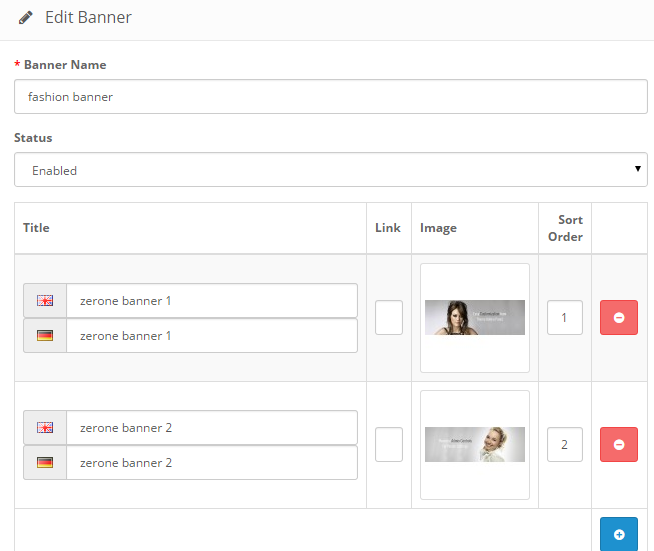
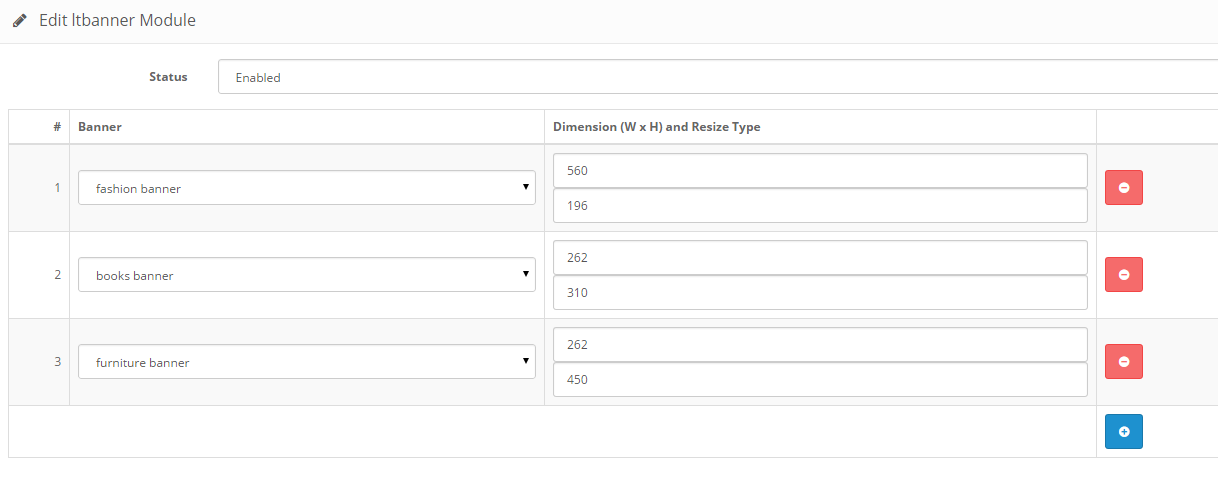
Custom Banner Module Settings:
To use custom banner you need to install module LT Banner module in extension. In Banner module you can set upto four images in a single banner . For column left and column right you can only use a single image and the width of the image should be 262 px and height can vary . For content top and content bottom you can set upto 4 images in a single banner . From the below image you can see for fashion banner width is set as 560px as it has 2 images . Depending upon the image count you have to set the width.
Simple Blog/News Module:
To use blog/news module first install the module in extension->module LT - News Module . Then goto Extension->News in this you can create news . And it supports SEO .
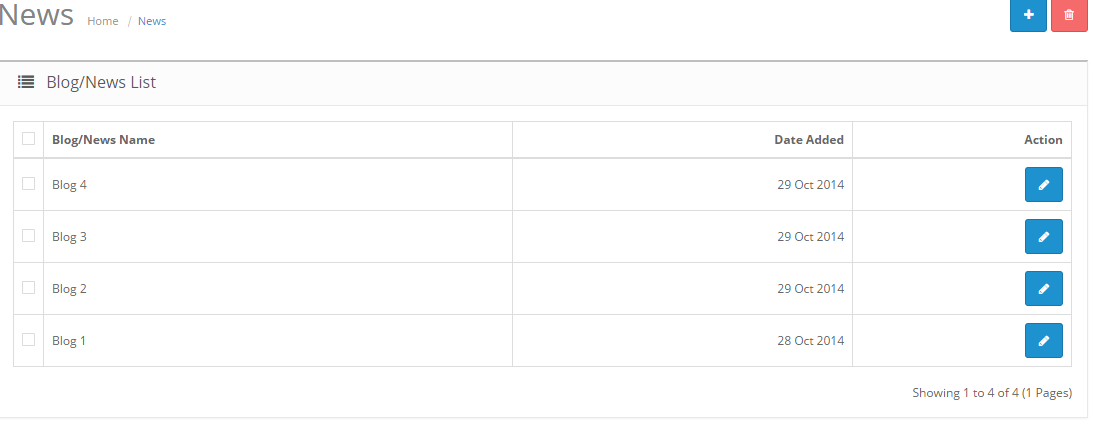

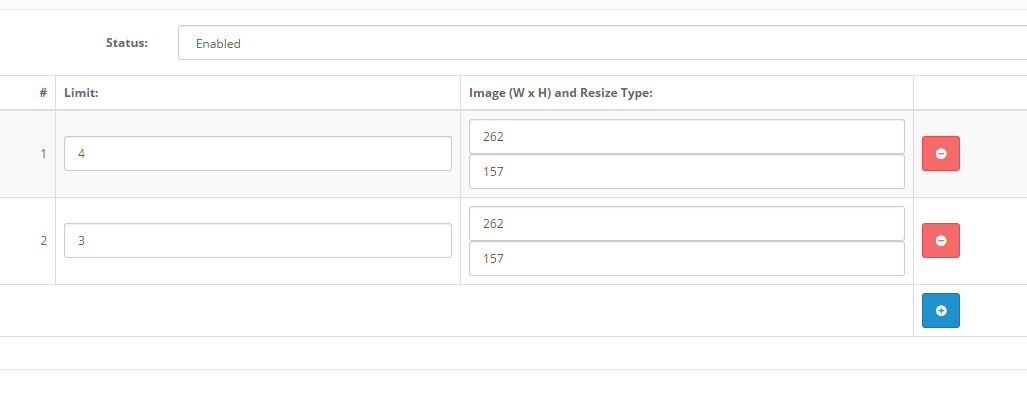
After adding the blog goto LT News module in Extension->module . You can place the module as you set the modules like latest, featured modules . The image width is 262 and depending upon the image you can set the height. In demo we have used width as 262 and height as 157
HTML Structure
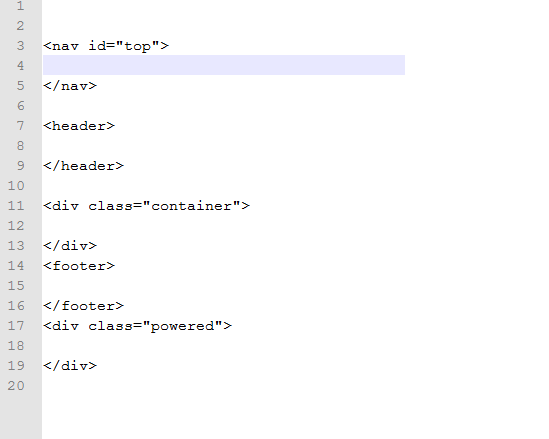
The main HTML structure of the template consists of 6 main containers containing all page ellements:
- Nav Top
- Header
- container
- footer
- powered
Header
The header div contains -
- Logo
- Currency
- Language
- Search
- Cart
- Main menu for pages
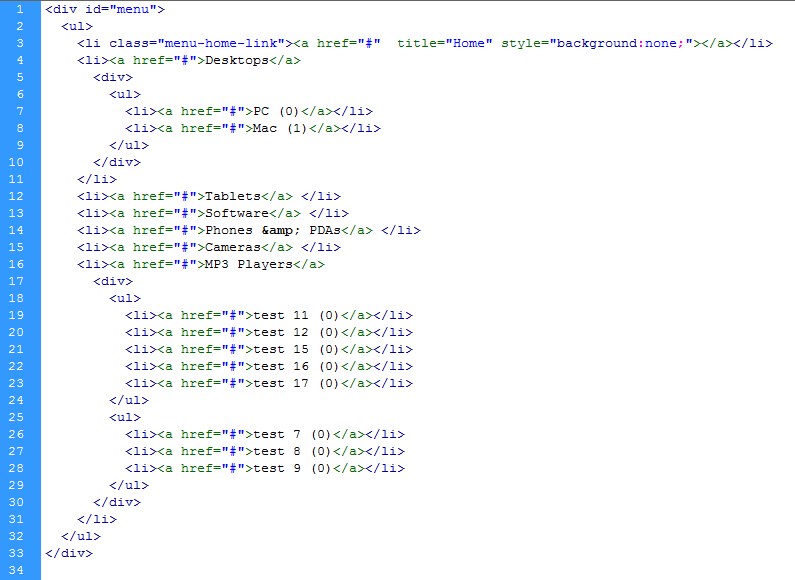
Menu
The menu div contains navigation elements of the template
- Category menu
- Sub Category menu
The category menu is a 2 level drop-down menu powered by jQuery & CSS3 custom script. The structure of the menu is as follows:
Content
Most of the page elements are placed in a container div with class "row". The "box" container have main parts: product-layout. All important parts of every page segment is placed within the "container" div.
CSS Files and Structure
The theme comes with several CSS (stylesheet) files grouped in the stylesheet folder:
- stylesheet.css - the main CSS file containg the layout styling for the theme.
- animate.css - Styles for the default Slideshow module
- The theme use bootstrap
If you would like to edit or change any color, font, or style of any elements in the template, It is recommended to use the theme control module and only if it's not possible to achieve what you need there to edit the general CSS file (stylesheet.css). If you would like to change the general color for links for example, you would change the following:
	a, a:visited {
	color: #9D0043;
	text-decoration: underline;
	cursor: pointer;
	}
If you find that your new style is not overriding, it is most likely because of a specificity problem. Scroll down in your CSS file and make sure that there isn't a similar style that has more weight.
e.g.
	#header .div5 a.toplinks {
    	color: #7C7C7C;
    	float: left;
    	font-size: 14px;
    	margin-right: 2px;
    	padding: 10px 8px;
    	text-align: center;
    	text-decoration: none;
	}
So, to ensure that your new styles are applied, make sure that they carry enough "weight" and that there isn't a style lower in the CSS file that is being applied after yours.
JavaScript
This template is heaving loaded with both custom JS functions and free jQuery plugins. All JS files are placed in a separate folder called "js". The list of files is as follows:
- custom.js
- wow.min.js
some of the jQuery plugins are heavily customized and changes in their files are not recommended.
All JS functions related to the theme content management are placed in custom.js or inline in the HTML files if required. The custom.js file is responsible for the main functions sliding effects, image fading effects
Sources and Credits
I've used the following images, icons or other files as listed.
- Font Icons - http://fortawesome.github.io/Font-Awesome
Once again, thank you so much for purchasing this theme. As I said at the beginning, I'd be glad to help you if you have any questions relating to this theme.Contact me throught support@latestthemes.net
Latest Themes